I'm switching my blog over to Posterous.
The new blog can be found at vincentwong.posterous.com. Just did the manual porting of 165 posts that I have done since Jan 2007. The old one will still remain though.
Posterous offers means to blog via email and also an iPhone app. Just perfect for me to do small postings. ;)
Let's hope this will improve my attempt to put new stuff onto the blog. Hahaha...
Wednesday, June 23, 2010
Wednesday, June 16, 2010
26 DC 45 amplifier - updated schematic

There goes thoughts of re-using the power transformers. B+ after regulation has to be around 455v. I probably need around 500v prior to regulation. This also means the capacitors would need to be put it series or to use the huge oil types. Unfortunately, I only have three 660vac oil run capacitors. The rest are 370vac types.
Now, I'm starting to wonder if the C4S can drop that much voltage. Is it able to handle the wattage?
VoltSecond has some useful information about implement the C4S at his site. Just reading off the chart, it is best to keep the C4S under 300v across the MJE350. One easy way is to drop the voltage with a resistor prior to the C4S. At 5.5mA, I would need a resistor of 30k ohms to drop the voltage to 290v at the top of the C4S. This will result in a R2 at the C4S of 145k ohm.
Tuesday, June 15, 2010
26 DC 45 amplifier

So, here's the scribble on paper. Operating points are pretty standard stuff for 26 and 45. The brief is simple... DC coupled amp, with driver C4S loaded and with LED biasing. Filaments will be DC current regulated. B+ will be regulated by a HV Maida circuit. Tamura F475 is intended to be the output iron, but I may A/B the FT10S that I got from Andix.
Chassis will be a departure from the tower types that I have been building. I'm veering more to the Fi designed ones. Wanted my wife to lug any fi stuff back when she was in New York some time back, but boy, there's a long back log being fulfilled by Don Garber.
Anyways, since the 6T10 project was not successful, I should look for another project that can hopefully reuse the power transformer. The 45 fits the bill as I've already got suitable output transformers and even a pair of RCA 45 tubes. I've also got a stash of 26 driver tubes. This will be my first all DHT amp. Wonder what challenges I will face... Should prototype this on a board first... ;)
Work on this hopefully will start at the end of this month.
ps. an eagle-eyed reader highlighted that my schematic has some mistakes around the cathode resistor for the 45 tube. i've forgotten to stack the driver voltage for the DC arrangement. will update the schematic tonight. thanks nick!
Monday, June 14, 2010
Universal Studios Singapore
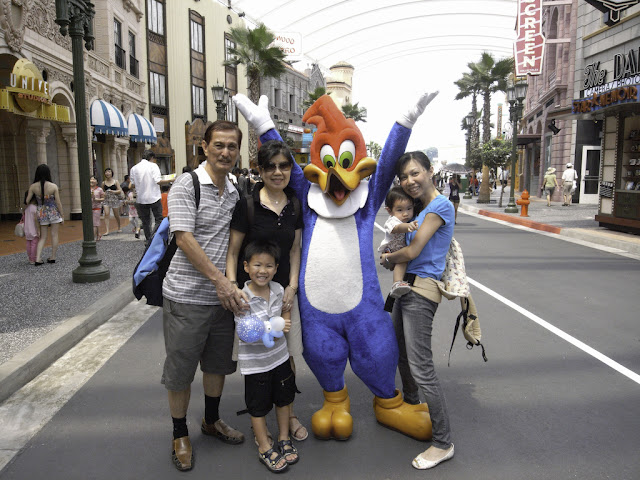
Went there last Saturday. Was a sunny afternoon and it was a weekend, plus the school holidays. Queues were generally long. The Rapids Adventure has a 80 mins queue...
Lucas quite enjoyed the Enchanted Airways ride at Far Far Away. The show at Far Far Away was ok, but I thought they over did the water spraying portions... Disney had the same type of shows too.
I thought the Revenge of the Mummy ride at Ancient Egypt was good. The queue was only 10 minutes. The walk in was long and winding though. Treasure Hunters was a let down. 40 mins queue and was a total waste of time.
I went with Lyra to Madagascar's Party-Go-Round (basically a merry go round). She dare not take the animals, so we ended up on the crate instead.
Waterworld was so-so. I did not quite enjoy it.
All in all, the park was small. But San thought it was better than Hong Kong's Disney.
Some pics here.
Monday, April 26, 2010
Audio part of the Tokyo trip

Only covered Andix. Was supposed to visit Audio Professor and some others at Akiba area, and also to pick up some Takman resistors, but really... traveling with kids in tow is very difficult to slot in personal agenda... Yet, it was when searching for Lucas's Animal Kaiser game machine that led me to Andix.
Was asking a staff in the arcade where I can find an Animal Kaiser machine and I used my Google Map as a reference. He pointed the current location and from the map, Andix is just the next block!
I left San and the kids at Tully's and did a quick recce at Andix. The front of the stairs is exactly like what I saw from the street view of Google Maps, but it's actually on the 4th floor. The stairs reminds me of those at the audio shops along Hong Kong's Apliu Street. When I got to the shop, Hiro-san was on the phone answering some queries. I walked around and checked out the stuff in the shop in the meantime.
I saw the FT-10S (which fits my budget nicely) in the display. There were also some Western Electric transformers and Tangos and lots of tubes. When Hiro-san was off the phone, I asked about the FT-10S and the bigger FT-20S. The FT-10S happen to be the last pair, and he's out of FT-20S. This made the selection process much easier. I got the FT-10S and asked if he has any 6ZDH3A tubes. There's only one left, but I will need 4 tubes if I'm thinking of building Audio Professor's 2A3. Hiro-san suggested that I visit Audio Professor. Turned out that I did not have the chance to go there due to time conflicts.
While there, I chatted with Hiro-san about the audio scene in Singapore and Japan. It appears that it is very much alive in Japan. According to Hiro-san, the FT-10S were made by his friend and there is little markup on the cost price, thus, making it more affordable and comparable/better in performance to output transformers that are higher priced. I wanted to try them out because of the very nice construction. It just looks so beautiful on it's own that I'm tempted to mount them naked outside the chassis for all to see. In fact, this is how Hiro-san's amp is built. When I was paying, I noticed that he wears a Sinn - the unmistakable face was peeking out his sleeve while he was writing the receipt. Hiro-san said that he has around 4 pairs! I was wearing my PAM177H then, but my sleeves were covering it.
Hiro-san actually gave me his last piece of 6ZDH3A tube when he was packing the FT-10S. I thanked him for his gesture of goodwill.
I asked for his permission to take some pics of the shop. Maybe I should have taken one of both of us just for keep sake. I'm sure to visit Andix again. But that will be some years down the road... when Lucas is tall enough for all the rides in Disney!
On our last day in Tokyo, we went to Shibuya, where Recofan and Disc Union were located. I only went into Recofan to have a look around. Lots of LPs. Will need lots of time to check each one. There were already some guys furiously flipping thru the LPs even though it's 11am in the morning. It's like 5 times of Memory Lane on one floor. There's also a J-Pop section. For a moment, I contemplated searching for the Hikaru Utada First Love LP, but the Katagana is simply too much for my basic knowledge.
More pics here.
Tokyo Trip

Went on a 5N4D trip to Tokyo. Was drizzling on the 2 days that were meant for Disney. What a pity.
We went to hunt for a place for Animal Kaiser on the first day. Walked around Akiba and went to all those bigger arcades, but could not find it. Eventually asked around and was directed to go back towards the Akiba station at Yodobashi Camera building. Found one machine at L6. I would have thought it was all the rage in Japan, but there are many more such card based games. Such as an Ultraman, 3X3 eyes, Gundam looking ones, etc. AK was Y100 ($1.50) per play. Cheaper than $2 in Singapore. Lucas played quite a few games. We eventually came back here on Saturday night as well.
Next 2 days are for Disneyland and Disneysea. Both days were drizzling. It was cold, our socks were wet and the feeling was lousy. Still, Disneysea was better... not so much drizzle. And the Tower thingy was great. We almost flew out of our seats. Lucas managed to take the roller coaster at the Little Mermaid area. It's the only one that he is tall enough for. We will have to return some other time in the future I guess.
We spent the next two days walking around Ikebukuro, Shinjuku, Akihabara and Shibuya before heading back home. Shopping is always part and parcel of an overseas trip. I got a very nice (but pricey) dark brown Ganzo Cordovan wallet to replace my Ferragamo one and a pair of Katherine Hemnett shoes.
More pics here.
Tuesday, April 13, 2010
Murphy's Law strikes at Preamp Shootout

First, a big thank you to Francis for being an accommodating host for us at the shootout. He recently had his Shanling CDP modded by a local guru to have the opamps working in class A. It was wired to use this stage with XLR connections and single ended connections via RCA will rely on the CDP's in-built tube buffer stage.
When it was my turn, with the same track played, there was this nasal vocal that emerged from the speakers... something was not right. I knew that there was nothing I could do if the preamp was at fault... I did not bring any tools and was definitely not in the mood to troubleshoot even if I brought tools... I told Francis that we should move on and bring in another preamp. By the time I was finished unhooking my preamp, I was perspiring as the air conditioning by then, was not as cold... There were more than 10 people in the room.
Later, Nick and William suggested that either I have some loose part due to transporting it to the location or it could be clipping. I told them that my bias for the 5687 was at -2.1V. Nick was guessing that it could be that the CDP's tube buffer had gain in it, which is not uncommon of the chinese designs that he came across. I thought it was a possible hypothesis. I was just disappointed that the audience did not get to hear the preamp. I was most interested to know if it lacked "speed", as that was the general comment about the tube preamps... unmatched for vocals, but lacked speed. The mercury rectifier and the shunt regulated supply should satisfy any "Need For Speed" fans. A quick A/B was done at some point in time to check if the 24/96 upsampling vs the normal red book had any effect on the sound as the Shanling CDP had a remote controllable feature for this. One guy was asked of his opinion and he did not have any reply at first, when the feature was explained, he said something like the 24/96 was better or something... I phased out and did not pay much attention at this point... I disagreed quietly as I could not discern any noticeable difference... not strikingly huge anyways... and not in the few seconds of A/B switching.
I tend not to be too judgemental when it comes to music. There are always generalisation that certain stuff cause certain sound. I think the DIY guy especially, should be open when approaching different topologies and implementation. In the same vein, most commercial gear people seem to have this unspoken discrimination of folks who build their gear. It is almost always in the same breath as low cost. I wonder how many of them would know that Tamura is used by Air Tight, Sun Audio, etc. Tango is used by Wavac, etc. Lundahl is used by Manley, VAC, etc. Some parts used by the DIY guys will rival those used by the commercial companies. In fact, it may in some instances, trend into the esoteric and exotic range.
When the solid state preamp brethren were playing, I gave them lots of leeway in their sound presentation. However, I felt most of them just seemed too bright and shrill sounding in the treble regions for extended listening. I immediately want to leave the room or find refuge from the assailing soundwaves... Nick echoed similar sentiments. Saying that the tube folks will not adjust to this type of sound well. I was also surprised that the Densen preamp (which the owner said had a SGD3k price tag when new) exhibited almost the same shrillness. I used to own the Densen Beat 100 integrated and found that it was quite a nice piece of gear. But it really required warming up to sound the best though. I'm not sure if that preamp was already warming up prior to being played in the system or my ears (or age have caught up) have slowly grown used to something not as exciting in the higher frequencies.
Unfortunately, I had to leave early as I had to bring Lucas for his lessons. So I promptly packed my stuff, thanked Francis and said my good byes to people I knew. On my way back, I was thinking that my system could be too tuned to my chain of equipment. DAC was a passive I/V unit, which had lower than the normal 2v RMS output. Maybe that was the reason why it did not clip the preamp... but 2.1V bias point would mean an input swing of 4.2V, and should be sufficient for any decently built gear...
Later in the day, when I was heading to Novena with my family, I got a call from Nick, informing me that my preamp should be fine as the problem of the nasal voices is back to haunt every gear they tried! I then recalled Francis saying that the CDP was modded and was running hot into class A. I guessed it could be due to that. It exhibited thermal runaway. That was just a conjecture. Not sure what really happened... cos the opamps were biased into class A and that should only affect the XLR connection. Why would RCA connected preamps be affected as well? No idea... but the guys were playing LP instead and seemed to be having fun.
I concluded that either I should raise my bias point, or don't lug such tailored stuff over for shootouts when the possibility for mismatch would be great. Oh, and I just listened to my system... it's working... no nasal voices.
Some pics here... from my iPhone.
Monday, April 5, 2010
Packing the preamp

Took out a diaper box and turned it into a suitable packing for a preamp shootout that will take place next week.
With 10 different preamps and many participants, it will not be meant as a definitive "best preamp" knock out, but more of an excuse for some audio nuts to get together and experience the different types of preamps available at the venue. It's a mix of commercial and DIY preamps. I think the results would be interesting.
Saturday, March 13, 2010
Head-Fi now

I've not listened to my system for some time. Even when I have the time, my kids could be taking naps, so blasting away on my speakers is not exactly desired. Then I started to think if I should venture into the realm of the sgheadphones and headfi guys... My experience with the Grado SR80 was good, except for the super uncomfortable sponges... It was torture just to listen to an entire cd album.
So I went to Jaben and asked for their recommendation for a comfortable pair of 600 ohms headphone. Turned out that they only had one 600 ohms model... which is the Beyerdynamic DT880. It's more expensive than the 250 ohms model though. I tried it and thought it was ok. Then I asked for a model in the same range, and they let me listen to the Denon AHD2000 (i think), but the highs were too pronounced for my liking. Testing was done on their cd.
I returned 2 days later with my CDs - Rammstein's Sehnsucht, Carla Bruni's Quelqu'Un M'a Dit and Ryuichi Sakamoto's Cinemage. Around 30 minutes later, I got the DT880, mostly because it is a 600 ohm headphone. I think that impedance matching is important and I wanted to see if I could make use of my preamp's 600 ohm output to drive the headphone directly. And also, there are an abundance of 600 ohm line output transformers available in the market. So, if I wanted to build a headphone amp, I would be spoilt for choice, compared to other odd values (but common values where headphones are concerned).
The DT880 have been running in off my ipod for around 40 hours on shuffle at moderate listening volumes. On my preamp, I need to crank to around 3 o'clock for loud volumes. 4 o'clock for Rammstein type of music is great for kicks. Anything louder for an extended duration may not be safe for the ears. This is using my CDPRO2 and the Monica DAC as a source. Output of the Monica DAC is lower as it uses passive I/V in the form of resistors.
I'll probably add the headphone output jack onto the preamp chassis soon. And maybe I should build an Akido headphone amp just for fun.
Some pics here.
Thursday, January 28, 2010
Preamp power supply rebuilt

The PS-2 shunt regulator was nicely fitted into the preamp. I contemplated fitting it into the power supply chassis, but gave up thinking of how to mount it. When I built the PS-2 on the heatsink, I was thinking of mounting it via a screw onto the back of the preamp. That's how it was done in the end.
But looking at the power supply, I wanted to rebuild it with a proper transformer as the one being used now outputs a B+ of 350vdc. The shunt regulator will be very hot dropping 200+ volts. And it turned out that I had one odd R-core transformer that was shipped wrongly to me when I ordered transformers for the 6T10. This also presents the opportunity to build a chassis that looks similar to the preamp.
I ordered the aluminium from Superfix as usual. Collection was done on the same day I placed the order. When I got home, I checked the dimensions and to my dismay, there is some excess on the metal. 3mm is not easy to file off... especially if there is a long length. I tried to do so initially and it was a tough job just to file off 2 surfaces. I then decided that I should get a Jig saw.
It's the first time I went to Homely Hardware Superstore at Ubi Cresent. It's almost like Home Depot and I had much fun there, picking stuff to buy. I ended up with a Makita Jig Saw and other stuff.
I also got some e-nuts, screw covers and stuff from Yong Seng Screws at French Road. The most I ever spent on screws... The screw cover set is not cheap. $4 for a set of 4 screw covers and mounting flange. I bought 10 sets of 4. The e-nuts were $20 for 100 pieces. I think I'm nuts... but I have a total of 3 chassis to build. One for power supply and 2 for the 6T10. My previous builds used wall plugs instead. Not very tight after may rounds of opening the panels.
The 3/4" MDF were bought from Ban Heng Long Trading at 11 Syed Alwi Road. They cut to the mm. Nice. ;) The jig saw was really nice. Opening the IEC inlet on the 3/4" MDF never was so easy. It's like a sewing machine for men! Trimming the excess off the aluminium was also effortless. Next time I should order my aluminium with at least 5mm excess so that trimming is easier.
I made sure that MDF was drilled carefully when putting the e-nuts in. First a pilot drill with 3.5mm, then 6.5mm. 6.5mm is the best diameter to use at the sides of the MDF. I tested it for grip and made sure the MDF does not split when the e-nut is screwed in place. Alignment is important. So I drilled the holes on the aluminium first, and then overlay it on the MDF and used a dot punch to punch the mark on the MDF for the e-nut position. The aluminium pieces were drilled 1mm larger so that I have some freedom to align the MDF and top and bottom aluminium. I got an auto dot punch when at Homely, and it is very accurate. It is spring actuated and is much more expensive than a normal dot punch. $16 each I think, but well worth the investment.
Finishing spray on the top and sides are Mr Hobby Super Clear lacquer. The front plate and rear MDF are sprayed with Tamiya Metallic Mica Blue to match the preamp.
For the power supply, I reused the 50H chokes and the current regulator. Topology used is the RCA83 -> 50H choke -> 56uF GE oil capacitor -> 50H choke -> Mundorf 47uf+47uF capacitor. This then goes to individual PS-2 shunt regulators for each 5687 tube at the preamp. I changed the 2 LM317 on the regulator to a LT1085 in TO-3P package. The output of the regulator has a OS-Con 100uF 20V capacitor. The series resistor is connected by a pair of screw connectors. This is done so that if I use my power supply for other preamp builds, all I need to do is vary the current to the tubes being used. Of course, a PS-2 would be in future preamp builds to vary the B+. ;)
I learnt a lot from this rebuild especially in the chassis construction portion. It was a fun build, and now I will be ready for a preamp shoot out with 9 other preamps after Chinese New Year. This would be fun.
More pics here.
Friday, January 8, 2010
Mighty Midget KIVed again

One of my KIVed project would be the Mighty Midget. I only got it working on one channel. The B+ was not enough when using the 6X5 rectifiers. Just a tad short for regulation. It was at around 290vdc. I need 300vdc for the Mighty Midget, and more if I want to use the Janus Shunt regulator. Out went the tube rectifier and in came some CREE CSD10120 babies. I'm using these 1200v 5A Schottky diodes from my parts bin.
I've also redid the Shunt Regulator onto a board and these are tested working.
The 6T10 really need a muting circuit, otherwise the amp will make some very nasty squealing noises upon power off. Tony recommended Rod Elliot's Soft-start circuit. Will have to order parts for this.
The time consuming portion is the need for a new chassis since the previous one had a hole cut for the tube rectifier already... Shucks... wonder if I should make this an all aluminium chassis... or stick with MDF and aluminium for quicker chassis construction.
Some pics here.
Revisiting the 5687 Preamp

This preamp was working well since it was built. There were a couple of mods done since then, namely, the Feedforward Shunt Regulator, and also the DACT 50K Stepped Attenuators. I was re-looking the design especially from the perspective of my entire chain, and thought I should try out a different operating point.
What I had in mind was to do a -2v bias. This meant removing one LED from each section of the 5687 and also adjusting the B+ voltage. I also wanted to try John Broskie's PS-2 solo design. I intend to reuse the 10M45S on the Feedforward Shunt Regulator and also the heatsink for this modification.
I went to Koba and got some 1% 10R and 1R resistors, Wima and Rifa capacitors, a pair of LT1085, and a pair of BI Technologies 7276 - 10 turn 50k potentiometer to be used to set the output voltage. I also threw in my Mundorf 47+47uF capacitor and bought a pair of 240R Kiwame resistors from AHFartaudio for the PS-2. All these goodies would make any power supply green with envy. ;)
The PS-2 solo worked like a charm upon power up. With a 10 turn potentiometer, it was very easy to dial in the voltage on the plate of the 5687. With this potentiometer, the working output voltage range would be from 50vdc to 250vdc. Next steps are to mount the regulator into the chassis, along with some minor wiring.
You probably want to get John's PCB for the PS-2 instead of hardwiring.
More pics here.
Bass panels are in place at last

Finally mounted, after some trial and error. I had to drill the bolts on the ceiling rather than the wall on the rear as the "wall" was really false wall. It's just a box meant to flush the 8 pieces of diffusor panels. Drilling on the ceiling was tough. The front wall was much easier to drill.
An extra wire had to be used to secure the bottom of the panel so that it can be pulled up into the corner, otherwise it will just hang down like a painting on the wall. I used my manfrotto tripod to help prop up the panel while I adjust the bottom wire as tight as I could. An extra pair of hands would be very useful, but I don't think I can find someone crazy enough to help me do this. ;)
After mounting the panels, it was off to vacuum the room and to shampoo the carpet. I used a Scotchgard High Traffic Foaming Cleaner from 3M for the carpet. Quite a good product.
Some pics here.
Subscribe to:
Comments (Atom)