Tuesday, December 29, 2009

Hollywood Dinos


We were at Jurong Bird Park this morning for the Hollywood Dinos trail. Normally there would be more pics, but I only had a few as we forgot the camera and I was using my iPhone to capture some images... that is before it flew off under a bridge with around 2 feet of water below.

There were not that many varieties of dinosaurs and it seems the dinos were reused from the Science Center exhibit. So for people who went to both, it may be an outright rip off. For us, it was just not worth the effort... especially considering my iPhone drowned in the expedition, but kudos to the staff who helped me retrieve the phone from the murky waters. I thought it would take forever and even considered writing it off on the spot.

The phone will spend the next few days in an airtight silica gel box in rehab. In the meantime, my contacts are wiped.

Some pics here.

Monday, December 28, 2009

Lucas's Xmas Break


Well, his school is having a 2 day break today and tomorrow. San brought Lucas to the zoo with her friend and kids. They waited for almost an hour before Ping and kids turned up!

Anyways, guess they had fun at the zoo. Of course, a stop at the children's playground area is mandatory.

We watched Alvin and the Chipmunks 2 earlier, and there were a couple of Meridian gear in the show. The F80 and I think a DSP5200 active speaker. So Dave digs Meridian... We'll be going to some dino thingy at the Bird Park tomorrow.

Some pics here.

Clearing the room


With some projects out of the way (either completed or KIVed even longer... haha), it is time to clear the room as the carpet needs a good shampooing... However, the 2 bass traps have been sitting at the side of my left speaker for way too long. I really need to get them out of the way.

Time to hang it up at a 45 degree incline at the ceiling at the front and back walls... I've been delaying this as I could not think of a secure and nice way to do so... I was listening to my music earlier and was looking at the painting hanging on the wall... then I thought, "why not hang it like the painting?".

And that was it. I am testing it out to see if it can bear the weight of the panel, which i estimate to be around 8kgs. The 19 gauge wire that I used is supposed to be able to hold almost 16kg. I got the 9.1m spool of stainless steel wire from Home Fix. One spool is enough for tying up 2 panels with some wire left.

My Manfrotto tripod was used to help hang the panel up so that I can test the load bearing capability of the wire. If it works, then I will drill a hole in the wall and use a M5 sized "sailor" (think that's what it's called) to anchor a hook. A carabiner will be used to hook the panel onto the sailor.

Some pics here.

Friday, December 25, 2009

Lucas's 5th birthday party


We celebrated Lucas's 5th birthday party earlier on 19th Dec instead of Xmas eve. It was at Xplorer Kids, Downtown East. His friends were invited and they all had fun in the huge play area.

Catering and some in-party entertainment was provided and the event was entirely outsourced. We just had to cart the presents back home.

More pics here.

Wednesday, December 23, 2009

Only transport clocked


Only managed to install the clock for the transport. SPDIF reclock was not possible as the circuit that does the digital out conversion on my cd pro2 kit is somehow defective. I recalled that it does not work even prior to me doing the reclock as then, I tried to route the EBU signal from my transport to the pcb, but there is just no signal at the digital output.

So, only the transport is using the new 1PPM TCXO clock. Nick Tan helped me during the troubleshooting. Some tips to determine if the new clock works is when the TOC on the cd is read and playback is possible by the transport. This is exactly what I experienced, but the DAC does not seem to latch onto the digital signal. I had to tap the signal from the EBU right to the BNC connector for my DAC.

While I was searching the web for more articles on reclocking, it seems that the majority of the solutions out there reclock the DAC portion while totally ignoring the transport. There is also another school of thought that sticks with the DAC as non-oversampled and without reclocking. Well, this is audio. Lots of debate, sometimes heated, but still, the ear is the final arbitrator.

The comments I heard so far is that SPDIF reclocking sounds "hard and stiff". I'm not able to do an A/B for the 1PPM clock. There's just no easy way to do this. But I can be contented with the knowledge that even the best out there reclocks the transport. ;)

More pics here.

Edit: I suspect I know why the digital output section seems defective. It's a fundamental wiring error. Will confirm this tomorrow or so.

Further edit: My suspicions were confirmed. Last night, I looked at the circuit diagrams of the digital out section on the cd pro kit, trying to figure out where could have gone wrong. At the input connector, I noticed pin 1 is grounded, which corresponds to pin 1 of the EBU out on the cd pro transport. The only thing wrong was the wiring... I wired it with the connectors facing the same side up and pin to pin with a coaxial wire as in a mirror reflection. This resulted in pins being swapped. Signal from EBU would be effectively grounded upon input at the digital section on the pcb, thus resulting in no signal output. I overlooked this minor detail which proved to be the major screw up. I'm not listening to the cd pro2 clocked at the transport and also has the SPDIF reclocked. Can't really tell if it is better with or without the SPDIF reclock. My DAC should be slaved to the timing of the digital signal since it does not have an onboard crystal. That means it is using the new clock signals.

Even when audio reviewers A/B changes that are hair splitting, they would do extended listening before making a switch. That way, it may be easier to pick up slight changes. I'm not an audio critic, but would live with a reclocked SPDIF for now, before I do more comparisons... Or I can leave it as it is, and if I do have a DAC that has it's own master clock signal, it would still be compatible.

PS. It's difficult to A/B especially since I am using tubes. Need at least 30mins to warm up the gear. And my RCA 83 mercury rectifiers on my pre and power would need around 3 mins to be preheated.

Monday, December 14, 2009

Reclocking the CD Pro


It's been approximately a year since I put together my CD Pro2 transport. I'm going to take the plunge and modify it with a better clock and also to reclock the SPDIF output.

With some help from Nick Tan, the daisy website and some blind faith, I took the risk to remove the crystal onboard my transport and get it ready for the reclock module on the pcb kit.

I realised that I do not have the appropriate 16.9344Mhz crystal, so a 1PPM TCXO is on the way from Vintage Audio Lab. I hope this USD20 crystal would do some tricks...

Also need to get a few of those 2 pin jumper plugs to connect the regulated supply input, 75ohm signal input and TTL signal to the reclocker board. Time to go Sim Lim Tower.

Some pics here.

Thursday, November 26, 2009

Nixie Tube clock updates


The clock is finally completed and in an enclosure. I thought for a long time before deciding what the enclosure should be. I searched for aluminium ones from farnell and also RS, but could not find one of the form factor that I am looking for. I then decided to do one from scratch.

I remembered that I have some aluminium sheets in my cupboard. I found a suitable 3mm thick piece that can be used. There was a pair of them, but I could not recall what I initially wanted to use them for. I just need to saw off one end to have a suitable form factor for the tube clock. Time for some muscle power to do this... Sometimes I wished I had one of those rotary blade grinder to do the cutting... ok, I'm hardcore... I even wanted to learn welding so that I could fabricate my own enclosures.

Nice real wood of the size that I wanted would be difficult to find; or maybe I had no idea where to look for pine, ash and such wood in Singapore. For simplicity, I decided to go for MDF. I arrived at the dimensions while on the way to Syed Alwi Road for the MDF which would be used as the base. I always go to this shop as their cut is very precise. Down to the mm. The dimensions of the MDF would be 3/4" thickness and 67mm x 40mm (2 pieces) and 185mm x 40mm (2 pieces). I also wanted to go to Lam Chuan to get some nice wood grain veneer to cover the MDF base in order to achieve look that I wanted. But I am not sure if they would sell just a piece to me... and the office is real far off... in Sungei Kadut area.

While I was at Plaza Singapura shopping around, I walked into this scrape book supply shop. I've noticed this shop for some time, but did not pop in to check out their stuff. They always seem to be packed when I walk past. There were lots of very nice paper there. I liked it so much that I decided to use the paper instead of veneer. I thought it would look real cool. Lucas chose the colour of the paper for me. I actually wanted a darker green, but in the end, we settled for a lighter shade of green of "Embossed Polka Dot Cardstock" from Made with Love. I liked their sparkly paper too... and their other one... and... well, you get the idea...

I went to Robert's place to have the 3mm aluminium plate cut using a 20mm hole saw. There was this dot punch that I used there. Just needed to push it in and it will punch down. Very neat... I should get one of these. The drilling turned out much better than I expected. I think I surprised myself at the accuracy of my markings. Hahaha... after drilling the first hole, I thought the second hole would overlap into the first, but it did not. All 6 holes are very well done. Thanks Robert, for loaning the bench drill, digital vernier caliper and the hole saw.

The aluminium plate was sanded using my orbital sander. Hah... this I bought, cos sanding by hand is really very tiring. It was then sprayed using a metalizer spray that I found in my store. It did not give the super gloss effect that I wanted. I think I should buy one of those Mr Hobby Super Gloss and redo the surface. The MDF with the polka dot covering was sprayed using a flat matt lacquer from Mr Hobby.

Not everything went smoothly... Murphy's Law always seem to hit me... First, there was not enough clearance length-wise for the pcb to be fitted into the enclosure after all the sides are glued to form a frame. Luckily it was MDF and cutting slots along the edges are not too difficult. This can be done easily with a pen-knife with a large blade. Just be careful when doing so. This proves to be an advantage as the pcb can be "slotted" into the MDF frame without having any screws to hold it in place.

Second, an angle connector for the SMPS had to be used as there is just not enough clearance width-wise for a straight connector. I went to Sim Lim Tower to hunt for one. I could not find any new ones, but I eventually found some in a section where the connectors were taken from some other equipment.

Third, don't believe the markings on the wires of different SMPS devices. They are obviously not universal. I soldered the SMPS to the angled connector by observing the markings on the wire. I matched the same on each, but apparently, the polarity was reversed... Only suspected this after I turned it on and the tubes were not lit. I then checked with my meter and it was confirmed... Turned out that the on board fuse at the pcb was blown. It could have been worse. After replacing the fuse (well, i need to get the correct one later... 800mA fast blow), it worked.

Overall, this is a fun project. I'm tempted to get the GPS unit, but there would be no space for a GPS adaptor... unless I wire out that connector... Guess I will pass. I know of 3 more guys who are gonna get this kit from Jonas. Have fun guys!

More pics here.

Thursday, November 19, 2009

Nixie Tube clock


I've got the Nixie Tube clock from tubehobby since June I think. I just did not have time to build it and also did not have the mood to enjoy my DIY stuff.

Recently, I finally tried to build the kit. When testing the power for the B+, I did so without the PIC in place and without the tube as I needed to adjust it to 160V. However, when doing so, I could only get close to my input voltage from my 12v SMPS supply. I looked at the circuit and tried to trouble shoot according to the circuit diagram, focusing only at the high voltage section. No clue... I then emailed Jonas from tubehobby as a last resort. He replied promptly in the evening. He mentioned that the PIC would be required in order to generate the voltage.

With this tip, I retried with the PIC connected and viola! B+ is there! After adjusting for 160v, I worked on the tube board, mounting the tubes to the sockets and then connecting them onto the logic board. Plugging in a 12V 2A smps supply, I turned it on and the tubes are lighted. I noticed that on most tubes, there is ghosting of the seconds display over itself. Initially i thought it could be that the B+ was not high enough. Actually, I think the components were running in. After around 10 mins of operation, the digits were clear.

In that time, I configured the time and date and also the "sleep duration" of the tubes. I got this particular board from Jonas because it is has better features compared to what's available out there on ebay and the web. The neat features are the sleep mode and the battery backup. I'm so tempted to get the kit for the larger tubes. ;)

In the meantime, I'm gonna build an enclosure for this baby.

More pics here.

Edna's here for a visit


We were supposed to go fly kites together at Buangkok, but her brother is down with fever. So Edna was here for a swim, after which, we had McDonald's together.

Some pics here.

Sunday, September 13, 2009

Busy weekend


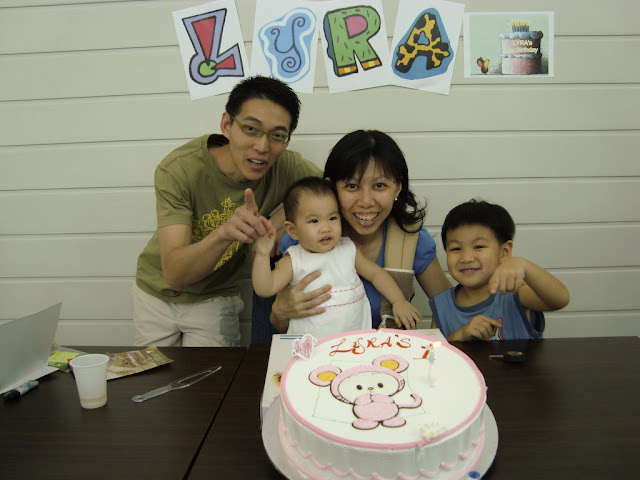
Lyra celebrated her 1st birthday at the infant care on friday. We celebrated for her at home today with some friends and relatives. The food from the caterer was quite good. Chili Padi Catering does nonya food. The curry from the chicken curry was very good. So was the bo bo cha cha. Their lemon tea also tasted quite refreshing.

Yesterday, we went to Pasir Ris Park and they played at the outdoor playground. We went had dinner at one of the restaurant there. The seafood was quite good.

Pics of her infant care celebration here.
Pics of the celebration at home here.
Some pics of Pasir Ris here.

Saturday, September 5, 2009

What's up doc?


It's been a long time since the last update. On the audio side, i have gotten proper stands for my Coral Beta 8s and have gotten a Lenco L75. A rebuild is in order for the Lenco some day down the road.

Over at home, things were not so smooth. We went to the zoo with Lucas and Lyra during the National day holidays. Then Lyra had fever for 5 days or so, then San got it for a week, then Lucas got it for around 5 days as well, then San got it back again. So the virus is doing it's round... we all recovered it time for a trip to Genting though.

Some zoo pics here.
Some Genting pics here.

Wednesday, July 22, 2009

Lyra's disappointing makeover


This was taken on 4th July right smack over lunch hours, with a cranky baby who just wants to nap and an elder brother who was especially mischievous during the shoot.

It did not help that the photographer was curt and did not seem enthusiastic about the job even though the studio supposedly specializes in taking photos of kids and pregnant women.

Some pics here.

Sunday, July 19, 2009

Gallop Park


Brought Lucas and Lyra to Gallop Stable at Pasir Ris Park Carpark C. Lyra was asleep when we got there, but Lucas had a look around and we got him to feed the horses first as he was hesistant about riding them. The feed cost $1. The ride was $10, but it was just a round within the park.

They do lessons as well. 10 lessons for $400. Quite reasonable I thought.

After that, we went to Explorer Kid at Downtown East. Lyra seems to enjoy herself in the ball pool.

Some pics here.

Monday, July 13, 2009

Cats CARnival


Went to the Cats CARnival yesterday at the Singapore Expo, but it was not to look at cars or race queens. We were there to cheer Lyra at the Baby Crawling Competition.

We had high hopes for her, but the results were far from expected when it was her turn. She was actually asleep, but had to be woken up to be ready at the starting line.

When it's time to go, she just sat there. Nothing could move her an inch. So, that was the end of the heats. No need to proceed further. We went to Changi Airport T3 for tea instead.

Some pics here.

Thursday, July 9, 2009

Humming transformer


Ok, not the movie, but rather the r-core power transformer that I got from Chung at vt4c. I wanted to try a r-core power transformer as I have not tried them in a tube amplifier before. Kinda regretting the decision though...

Chung said that the primary windings are not marked correctly, thus I have wired them out of phase, causing the hum. He suggested that I try to wire the black wires as 0 and 230v and connect the red and orange together to get 230vac on the primary winding.

I tried this out and the hum is lesser, however, the transformer heats up after 10 seconds or so.

I decided to wait for him to measure the transformer when he gets to his warehouse. I've stopped work on the amps for now. In the meantime, I'm expecting to pick up my Nixie Tube clock kit from the post office tomorrow. Yeah... Always wanted to build one of these.

Gonna look around for a nice enclosure to house this baby. ;)

A birthday celebration


Nowadays, between San and I, our birthday celebrations are muted compared to Lucas's. I bet Lyra's would be a bash when we celebrate hers in September. It's the same feeling about Chinese New Year when one grows older...

Anyways, wanted to get a string of black pearls, but just in case, I asked what she would like me to get. The answer came in a sms... chocolate cake and crabs.

Ok. Well within budget... So off I went to look for nice chocolate cakes. Google helped, and I eventually called awfullychocolate to place an order for an 8" all chocolate cake. We had dinner at House of Seafood. The highlight would be the 1.6-1.8kg chili crab. Thereafter was the cake cutting back home.

Actually, I must say that the chocolate cake is over hyped. It was not what I'd imagine. I should try Canale Patisserie Chocolaterie at Paragon next time.

Friday, June 26, 2009

Tully's Coffee


Tried Tully's coffee when I was at Orchard Central yesterday. I just had to take the mocha as it uses Ghirardelli chocolate.

Tastes great... reminds me of the time when I worked in the Bay Area. I will surely return for more.

Wednesday, June 24, 2009

Mollydooker 2005 Carnival of Love magnums


Ok, anyone wants to buy this Shiraz off me, just drop me a mail. ;)

RP rated 99 pointer. Cellared at a warehouse.

hansgrohe installation problem


Got the Talis S basin tap from Econflo Systems, but when I tried to install it, I realised that the fixing hose does not come with a nut to secure onto the water outlet from my wall. It is just straight thru... Strange.

I called them up the next day and they said the plumber will know where to get those. So I did a search on hansgrohe's part list to locate the part. The closest I found is part number 94158000. I called them up and ask about it, but they advised that I get them from any hardware store. Getting it from them is around SGD$8 each.

In the end, I went with the tap to the store opposite my place. They were surprised to see that my hose does not have a thread for the nut and even suggested that I bring the tap back and get the hose changed! Anyway, they recommended this L shaped thingy with an inner sleeve. Supposed to wrap tape over it and then secure it to the hose and tighten. This is actually called a 90 degree brass compression fitting and brass compression sleeve (ferrule). A pair for SGD$7.

I spent the night fixing the tap and it worked like a charm. Water does not spill over the raised basin so often now. Guess I'll fix the kitchen tap tonight.

Monday, June 8, 2009

Janus Regulator mostly done


Finally got the 2 regulators wired and mounted to the chassis. Previously I wanted to use a GE 22.5uF oil capacitor as the first capacitor. But once the power transformer and the regulator are in place, there is simply no room for the oil capacitor.

Just got to cross my fingers and hope they work... I've checked the wirings many times and fixed some wiring errors. Just got to wire up the signal portion in order to use it as a load for the regulator. Good thing is that I have a rheostat to slowly increase the B+. ;)

Once this works, I intend do this to my preamp psu as well. Yeah...

Sunday, June 7, 2009

IPPT yet again...


The 2.4km timing improved, but it is still 30 seconds off from the gold award. Guess I will never be able to reach that pace. When I first started on the initial lap, it felt like running in Kanchanaburi's almost afternoon sun. It was damn hot. Unlike the treadmill in the gym where it is air-conditioned.

Maybe I need to run more often... I only ran about 4 times prior to my test... but the first time I ran since last year, the muscles ached for 5 days... I should go for the next IPPT right after my birthday when the window opens again (I tell myself that everytime...).

More Lyra pics


It's been 3 months since I last uploaded any pics. Well, actually did not really take that many. Saw some of my niece and nephews pictures on facebook, so here are Lyra's.

More pics here and here.

Monday, May 25, 2009

shared ground mundorf


the mundorf m-lytic have a common ground, rendering it unsuitable for the janus design as i wanted to use the capacitor in C3 and C4 positions.

bummer bummer... got to get a few more capacitors for the janus section. i ended doing everything up on a perf board as the whole lot is quite heavy to be mounted by double-sided tape and zip cord. also, there is not enough space for the GE oil capacitor as the first capacitor.

i'm doing up the amp bit by bit... slowly, but surely...

Wednesday, May 20, 2009

hybrid power supply


now i'll have the opportunity to try the hybrid power supply. the good thing about a blog is the "diary"-like effect. I use it to write notes to myself... and in this case, is to remind myself that I need to use this topology for the Mighty Midget since my r-core power transformer (R0080-043) does not have a center tap.

according to the original author, there was no difference in measurements between a pure tube based power supply and this hybrid power supply. so, what then, is the advantage of implementing this? purely to cater for power transformers without a center tap... notably the Lundahls in this case. ;)

Tuesday, May 19, 2009

compactron sockets


horror of horrors... the 6D10 compactron socket that I got are not the correct ones! I got the 9 pins instead of the 12 pins... argh...

guess i have to wire up the rest of the connections and the power supply sections first...

above is the work in progress janus shunt regulator, with 12w ohmite rheostats and kiwames in key locations. the power supply will be rectified by rca 6ax5gt, then 22.5uF GE oil capacitors, then the janus shunt regulator with mundorf m-lytics.

i reused the moskido chassis for the 6t10 mighty midget. had to drill new holes for mounting of the r-core power transformer (R0080-043) from vt4c.com and also additional holes for mounting of the james output transformer. the moskido chassis had 2 octal tube holes already drilled. i will have to use the front one for the rca 6ax5gt and the rear one for the ge 6t10 compactron. the janus regulator will be on a separate copper plate. i sawed it from my m10 preamp chassis (an early project that was decommissioned).

no matter how i planned, i will miss some parts... this time round, i missed the 200R cathode resistors for the mighty midget. all of the resistors to be used there are takman rex carbon film resistors. got to replace with kiwame...

some pics here.

Monday, May 18, 2009

moskido terminated

The moskido schematics have changed since the last time I looked at it. Now they are Direct Coupled, using a DC servo to get rid of the large output capacitor. Apparently this new version is much better than the original version.

But this requires another pair of mosfet per channel and the heatsinks that I got are not enough to dissipate the additional heat... Guess I'll have to KIV this project.

In the meantime, I am going to convert the chassis that I did previously for the 6D10 Mighty Midget. Gonna go grab some parts later.

There are not enough audio DIY related posts... hopefully I'll update with some progress tomorrow. I need to work out the tube rectifier and also Janus Shunt regulator stages for my Mighty Midget.

Monday, April 27, 2009

赵学而 - 聽


Bought her cd today from Roxy at Adelphi.

Not exactly what I was looking for... I mean, the songs did not endear themselves to me, however, track 11 - 祝君好, did stand out as one of my favourite on the cd. Maybe needs lots or re-listening before the other tracks grow on me.

I don't really like the mixing/mastering. It did not do justice to her especially if this is self-funded. It's a tad bright and on track 11, the background noise is audible when she sings.

Anyways, the other place to get this cd would be New Disc Village, also at Adelphi.

Wednesday, April 22, 2009

Deep Blue - Skye


It's Skye, not Skype. A local singer who does weekly stints at St. James Powerhouse. Got to know of this album from maggielurva of desirable audio boutique. The album was recorded in Republic Polytechnic Music Room 1 and 2. This was the venue for the past 2 years of NoiSing (07 and 08). Acoustics there is really very good. I think the students may not know that they have such good facilities at RP.

Back to the cd. My wife thinks the CD is horrible. I tend to value her comments. This made me listen more critically to the album. To be fair, she heard the cd when she walked past my room. I play my music LOUD and with no apologies. Maybe if she was in the sweet spot, the comments would be more positive.

Skye has the tendency to sing at a lower volume, then reach a crescendo in later parts of her songs. She slowly builds the energy and anticipation depending on the songs. Track 4 - 味道, seems to be recorded on a totally different day from the rest. It just sounds different in terms of background and gain level. After listening to this track, I can't distinguish if the others are done the same way.

It's interesting to note that William Scorpion and Angie used to sing 味道 back in Canto days (yeah baby!). Now he's paired up with Skye at St. James. I have not listened to them at Dragonfly though. Perhaps will drop by one of the weekends.

Singing covers is always a tough job. These were staple songs during the 80s-90s and there will always be a tendency to benchmark against the original artists. Skye did a good job by using her variation to interpret the songs. I think some of the music accompaniment on the songs are quite distracting. Maybe this is the Iskandar Ismail style.

The recording was done using B&K mics and recorded direct to a 2-track DSD recorder. No mixing and mastering. As simple and truthful as it gets. If NoiSing09 comes along, I wonder how deja vu it would be to play this particular album there.

Buy this cd if you support local music, want to listen to something refreshing, like Mandarin pop, like Skye, like St. James. Overall nice album. Her renditions were not bad. I have a bias for the A-Mei songs. ;)

I got mine at Gramaphone - Cathay. Now I just need to search for 赵学而's cd. Give me a shout if you know where to get one in Singapore.

Sunday, April 12, 2009

Bird Park on not so Good Friday


We went to the Jurong Bird Park on Good Friday. It was a mistake... long journey, long queues, lots of mosquitos and quite a fair bit of people compared to other days.

There is actually no comparison between Bird Park and the Singapore Zoo. The dismal food available within the Bird Park can't compete with what the Zoo has to offer.

Anyways, some pics here.

Wednesday, March 18, 2009

My stash of Irons


Here's my stash of irons. From left to right, they are, James 6132 output transformer, a pair of supposed James OEM output transformer (complete with James badge), Lundahl 1623 (120Ma) output transformer, and a pair of C core 20H chokes (100mA). I have another pair of 10H chokes, but could not locate them for this group shot.

Enough irons for at least 3 x SE amplifiers.. probably need a few more chokes, but the one thing missing is the power transformer. Well, this is deliberate as the tube used for the output transformer have not been decided most of the time. And for my setup at home, I want to build mono-blocks. This will increase the price by the associated power transformer, choke, capacitors, and additional chassis.

With the power transformer going for at least SGD300 each, getting two for one mono-block project starts to be cost prohibitive. Iron costs are going up in Singapore compared to a year ago. Locally made power transformer used to cost below SGD100 each. DIYers are completing less power amplifier projects. It is much cheaper to build a preamplifier nowadays. I find it strange that some commercial preamplifiers can cost more than the power amplifiers that they are supposed to be paired with.

So, how now, brown cow? I'll have to explore China-made power transformers and keep my fingers crossed that they do not short and trip my circuit breaker... Good thing I have a dedicated power supply direct from my main breaker into my audio room.

Tuesday, March 17, 2009

First taste of solid food


Have not been posting as much as I'd like to. Just uploaded new pics of Lyra taken in March. She started on her first solids a week or two ago.

The following few days at the infant care, she took a long time to finish her cereal. Prior to this, she kept looking at us longingly when we are eating.

More pics here.
Tuesday, February 17, 2009

Man and Woman differences - an audio perspective


I've seen this picture before. It attempts to capture the differences between Man and Women from an audio component perspective. Hmm... even in the picture, it is missionary.

Some audio forum discussion here.

Not enough pics of Lyra


I realised today that there are not enough pics of Lyra as compare to Lucas when they were the same age. So, here are some of the nicer ones, categorised in months.

More pics here.

Saturday, February 14, 2009

1 Foot Speaker Stand


Have been searching for a speaker stand for my Corals for some time. I went to The Helping Hand to check out their teak stuff, and also to Teakland at 18C Upper Serangoon Road, but could not find something that is 1 foot in height. I have to saw off the legs of the cabinets at Teakland in order to get the height I want.

I also went to this shop at Park Mall at the first floor. They had some very nice solid wood sculpture like stuff. According to the shop owner, there were people who bought their stuff to be used as speaker stands, but the height was more suitable for the small bookshelf speakers, being 24" high...

In the end, I considered buying the IKEA BEKVÄM N step stool in Birch. This stool is real heavy and cheap. At SGD29 for one, what more to ask for. I just need to saw off the legs. The challenge is that there is a slight angle as the legs spread open ever so slightly from the top. Since we had no plans today, we went to IKEA for dinner and I grabbed the step stool on the way back. However, it was a bad time to go to IKEA as apparently, they had some sale going on. It was just too crowded!

For now, the pair of step stools will just sit in a corner till I feel like doing some sawing. ;)

Back to Jacob Ballas Children's Garden


Went there, with Lucas & Lyra, last Saturday after Lucas's swimming lessons. The last time we were there, we only had Lucas then. This time round, we were there mainly to feed the swans, pigeons, tortoises, and fish.

We went home tired and the kids slept so long we were almost late for a Chinese New Year dinner. Anyways, the dinner started late and we got there just on time.

Some pics here.

Thursday, February 12, 2009

Tuesday, February 3, 2009

Rammstein LP


Was surfing my favourite online shopping site and noticed a Rammstein LP and I immediately bought it. Will have to wait till I get my Thorens TD150 back to listen to it...

Monday, February 2, 2009

UcD180 in action


Here's a picture of the UcD180HG driving the speakers... Onken bass bin with Altec woofers, and Goto mid and high frequency horns.

This is the interim setup as the active crossovers are still a WIP and the whole setup would be shipped to another country. I had the opportunity to listen to it, but unfortunately, the bass was not crossed optimally. But still, there is no denying the potential in this setup. The mids and highs were crossed correctly though, image and soundstage were superb. I thought the UcDs could do with some running in or the bass could be dialed in better as they were a little lumpy. Does not have the snap and attack that I thought it would have.

The setup will eventually be driven by a front end that could consist of a hard disk based system, 6 channel pro audio sound card, the Sabre 32 bit dac and a 6 channel preamp. Phew.... This will be a totally ka ching setup.

Totally esoteric... more pics here.
Saturday, January 24, 2009

Completed at last, the 6 channel UcD180


Finally got it done! Yeah! Tested working with all 6 channels. I did not really run it in as I do not have XLR inputs nor Speakon outputs.

It was a good learning experience for me. The main aim was not to drill too many holes onto the bottom of the chassis when mounting the UcD and SMPS modules. I guess this has been accomplished. I had 6 holes in total at the bottom. 2 for each SMPS module. A 5mm aluminium plate was used as the heatsink for the UcDs. This plate was mounted securely via the vertical slots on the bottom plate. Another aluminium plate was used as a shield between the 3 x SMPS modules and the 6 x UcD modules. This, according to the SMPS manual, would not be required as the SMPS is supposed to have low EMF/RFI radiation. Well, I did not have the luxury to read the SMPS manual prior to ordering the aluminium.

Next project would be to try out John Broskie's Janus Shunt Regulator on my preamp.

Wednesday, January 21, 2009

UCD updates


One channel of the UcD in test tonight. Took me some time to find the connectors for the input. The are supposed to be Molex KK 2.54mm or 0.1" series. I did not have enough quantity to order online from RS or Farnell, so had to search for compatible ones from Koba. Found the connectors there, but eventually, had to use them without the housing as this offered better connection. The mechanical construct of the housing did not render it to reuse that well after stripping the previous wires and replacing them with the mundorf silver/gold wires.

Then, it was the single ended RCA to XLR connections that caused me to search high and low for the reason why no sound is coming out from the speaker... I shorted pins 1 and 3 and used it as ground. Pin 2 was signal. But no effect. Actually it was because there was a internal lift up /ON pin on the UcD module that had to be grounded or connected to J2, pin 5 of the SMPS module. Need to get some more connectors to do this nicely.

Well... at least it is almost there... Before Chinese New Year.

Some pics here.

Saturday, January 3, 2009

Mighty Midget parts


Got some parts in the mail. They are GE 6T10 compactron tubes, Takman carbon and Mills wire wound resistors. Also in the picture is the Mundorf gold/silver wires. The wires are used as hookup in the multichannel UcD amp. Have to complete this before I can free up some space for either the Moskido or the Mighty Midget. I've already received the sockets for the 6T10. Got 12 of them from ebay... So if anyone needs a couple in Singapore, I am more than happy to sell some. ;)

I am more inclined to do the 6T10 at this moment. Possibly with a John Broskie Janus Shunt Regulator at the B+ as shown below.


Need to dig out some parts to see what I should use for the PSU. Cannot remember if I have the 6X5 or 6X4 rectifier tube around. If I am using a regulated B+, I may just use a CLC with the Nippon Chemi con 220uF capacitor.

Some pics here.